
Thank you Color Ashram for creating this beautiful video. I am honored to share this space with Gasali Adeyemo!
Category: Indigo
Very Exciting News!


Indigo Exhibition 2020
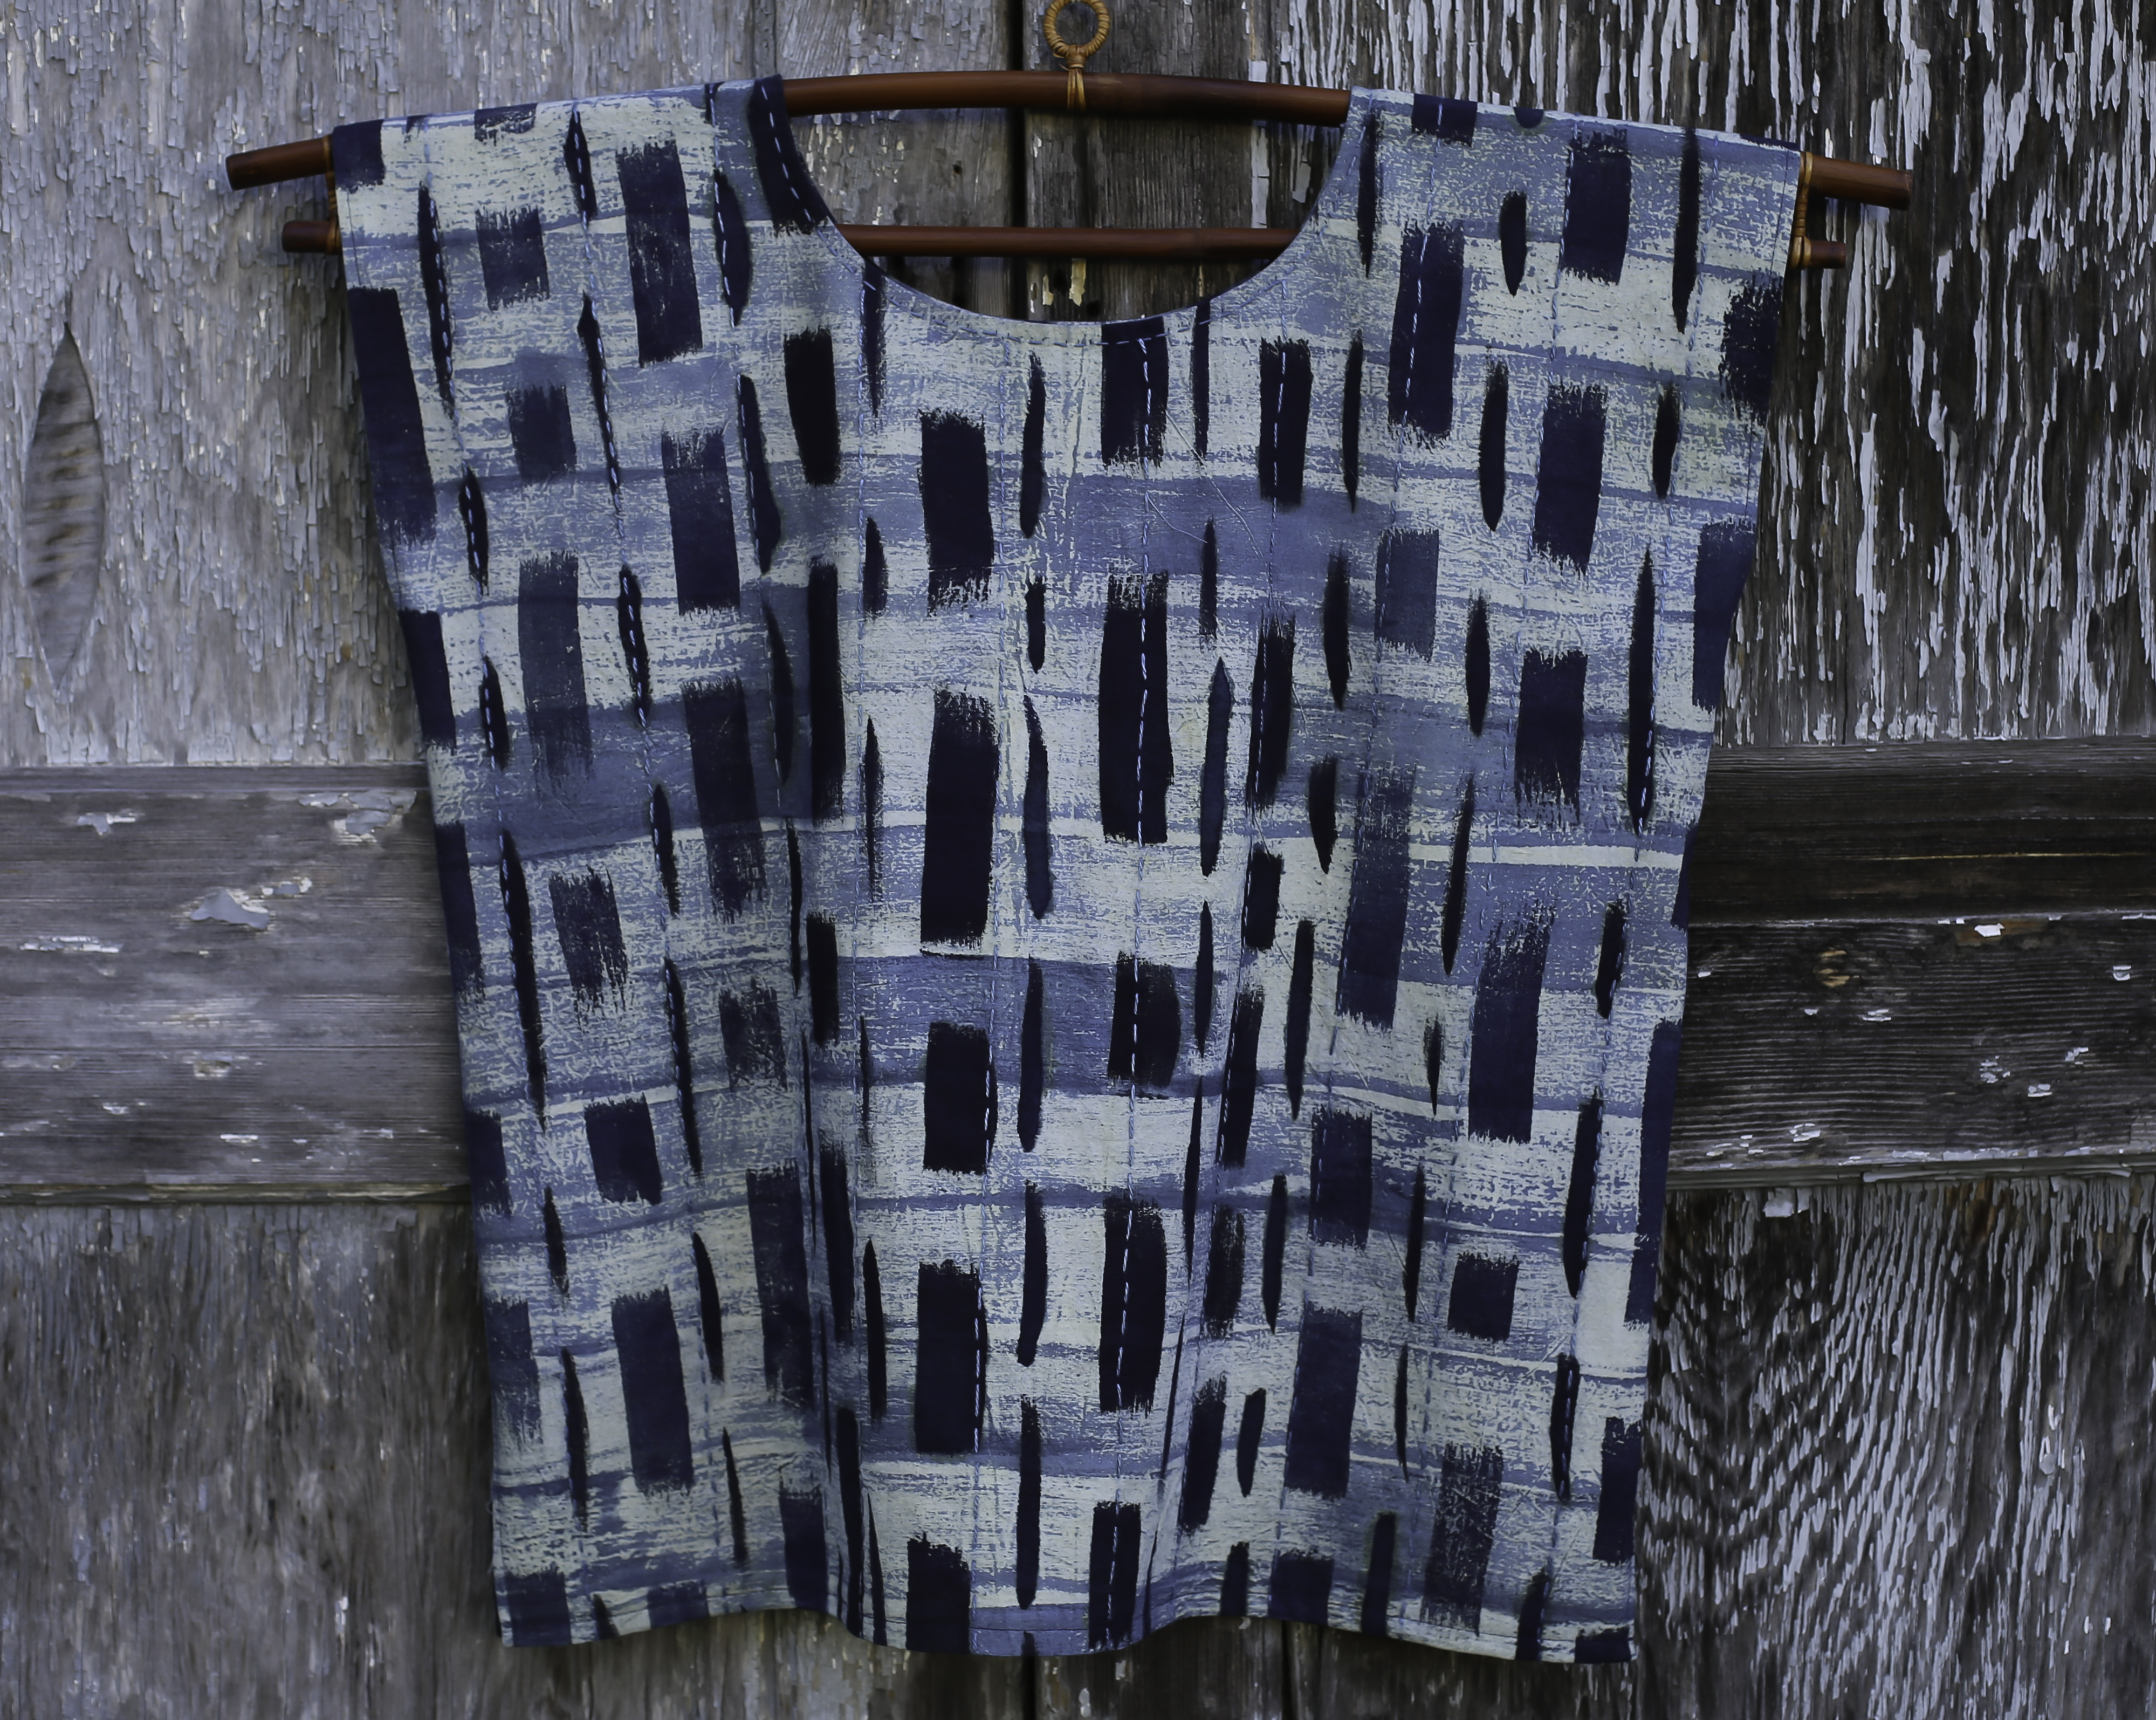
I am completely over the moon!! My indigo garment has been accepted for an exhibition in Tokushima, Japan!
The piece is titled Blueness/Oneness. The inspiration came from many places.
First, seeing a beautiful piece by my friend Pavrita Shyam (who I met at IndigoSutra in Calcutta, India) began several conversations about Kalamkari techniques.
This led to my spending several months doing many experiments with various natural binders, indigo stock solutions and curing times on cotton cloth.
Culminating in Blueness/Oneness. A cloth with many personal connections.
In this garment I bring together the style of the Mexican Huipile – influenced by my many trips to Oaxaca to teach Indigo dyeing and other workshops at the Museo Textil de Oaxaca.
Often the Huipile is made from one piece of handwoven cloth – so too is the Indian Sari one piece of handwoven cloth!
Next – the natural binder of High Fat Milk and Myrobalan used by the Kalamkari artists of India allows me to paint on the muslin (cotton cloth) woven in India.
Indigo powder from an amazing NGO in Bangladesh – Living Blue – is used to make the stock solution.
Silk threads from China are dyed with Japanese Indigo from my garden. They are used for Sashiko stitching (a Japanese technique) to embellish the garment.
And finally my adaptation of my friend Michele Wipplinger’s Indigo stock solution formula!
Putting all this together with my own design sense and we have Blueness/Oneness! A coming together – a celebration – of many cultures!
The exhibition will take place Jan 18 – 26, 2020 in Tokushima, Japan.
Bunka no Mori Event Hall, 21st Century Building, Bunkanomori Park
Mukoterayama-1, Hachimancho, Tokushima City
Tokushima Prefecture, Tokushima, Japan 770-8070
Also I will be teaching this technique and more at Aranya Natural in Munnar, Kerala, Southern India in Feb 2020 at their 25th Anniversary Celebration.
For more information click HERE
Wonderful video about Japanese Indigo

Here is a link to a lovely video that goes from seed to garment.
You will meet the growers and dyers who are keeping a centuries old tradition alive – Enjoy – the link is only good until September 29th 2018!
Fresh Leaf Indigo Dyeing – Salt Method
Here is a link to a very interesting video about Fresh Leaf Indigo Dyeing with Japanese Indigo (Persicaria tinctoria) using salt!
And here’s how I do it!
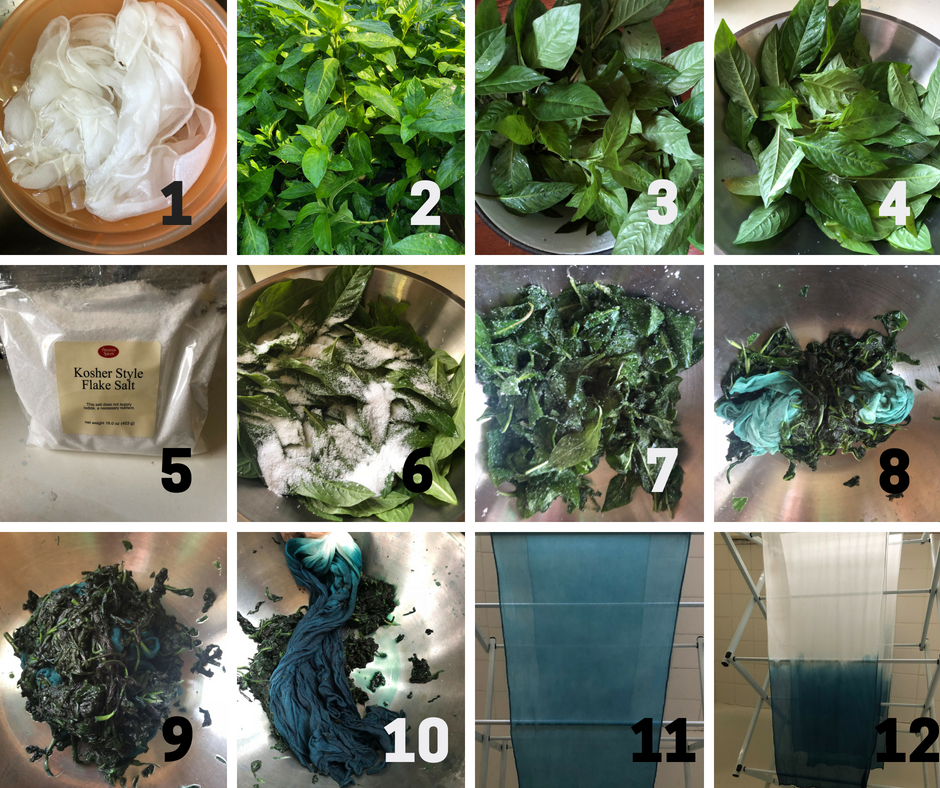
The Steps!
1) Scour Silk Scarves
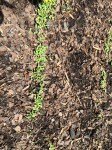
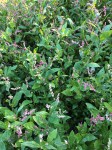
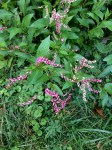
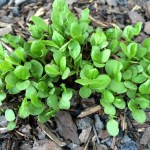
2) Persicaria tinctoria ready for harvest
3) Harvested indigo being kept in a bucket with water
4) Fill a 5 qt stainless steel bowl with leaves
5) Kosher Salt Fine Flake
6) Add 3 tablespoons salt to your leaves
7) Knead the leaves have until they begin to shrink and produce liquid
8) Add the scarves and begin to knead the leaves and scarves together
9) Add more leaves if needed to cover scarves, Check scarves to be sure there are no white spots.
10) The longer you knead the darker the blue
11) Solid Blue – Hanging to dry after rinsing, washing and rinsing again
12) Borders dyed – Hanging to dry after rinsing, washing and rinsing again
My Love Affair with Indigo

My love affair with Indigo began many years ago. It was when working with silk dyes that I needed to find an alternative dye source as I began to have a bad reaction to the chemical dyes.
At about the same time, I moved to New Mexico where I had the opportunity to be exposed to natural dyes being used to dye yarns for the beautiful woolen rugs being produced there.
As I studied the plants of New Mexico, and learning their uses both for color and medicine, I began forming a long-term goal of working with natural dyes.
For many years I was a dabbler – experimenting, studying and reading about these fascinating dyes.
Fast forward to August 2001 when I opened The Yarn Tree, a retail store selling yarn, fiber and dyes and studio in Brooklyn, NY. I suddenly had space where I could begin dyeing on a larger scale. I began dyeing yarns to sell in my shop and eventually teaching workshops in natural dyeing. I can still remember my excitement (and nervousness) at working with my first indigo vat – this amazing and magical color that I had studied for so long. My first vats were chemical vats – using natural indigo with a combination of lye and thioureadioxide. These chemical vats gave great color and were not difficult to make but gave off a wretched odor.
Once again fate intervened – I had been living in a tiny rent controlled studio apartment for many years when a large apartment with an outdoor space came available near my store. That spring I set up my first natural ferment indigo vat. I believe it was 15 or 20 gallons in size. This was when I first began to think about the possibility of growing my own indigo but it would be years before I could do so. By the next spring I had taken on a second studio space that was to be my dye studio. Here I set up a 55 gallon natural ferment indigo vat that I kept alive for 5 years.
Unfortunately in 2011 I closed the business and left NYC as I could not recover from the 2008 recession.
I moved to the South, first to Asheville, North Carolina and eventually to Greenville, South Carolina and continued to work with, teach and sell indigo and indigo dyed products.
There is a history of indigo growing in South Carolina. It was first grown on a plantation run by a young woman, Eliza Pinckney, in 1740. She grew Indigofera tinctoria and it took three years before she had a successful crop. Indigo then became an important cash crop for the South until the American Revolutionary War!
Knowing that the climate here successfully hosted indigo growing I decided to finally pursue my long held dream of growing and using my own indigo.
I purchased Japanese Indigo seeds (Polygonum tinctorium aka Persicaria tinctoria) from Rowland Ricketts and got ready to plant.
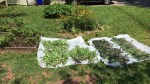
My first planting was very small – an almost heart shaped spot on my front lawn where once had been a large tree since removed. I had a successful crop and used the fresh indigo leaves to dye silk scarves.
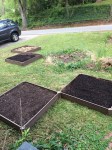
For year two I decided to expand and purchased the materials to make four raised beds each 42inches X 42inches. I set these up on my front lawn. Again I had a very good crop. The first harvest was used to do fresh leaf indigo dyeing and the second was grown for the seeds.
My next goal is to expand my growing area and I am hoping to get my hands on some Indigofera tinctoria seeds. I want to grow Indigofera tinctoria and make my own indigo cakes!
I have had the opportunity to teach indigo dyeing (and natural dyeing) in many parts of the world including two workshops at IndigoSutra in Kolkata this past November.
For me it was a natural progression to go from experimenter to dyer to grower.
But why this fascination with indigo?
I like to say that Indigo is as old as time, we know it has been in use for several thousand years. It is grown all over the world – just different species – Indigofera tinctoria, Indigofera suffruticosa, Indigofera guatemalensis, Persicaria tinctoria to name a few.
Each culture has their own method of going from green plant to dyestuff whether it be fresh leaf, balls, cakes, paste or sukumo. Each culture has its own way of making an indigo vat with their very own special and sometimes secret ingredients. Yet we all produce the same color – Indigo Blue. Each culture has great respect for indigo and most honor the Indigo god with offerings, altars and sacrifices. And indigo has many names Anil or Nil – thought to be after the Nile River, Indigo coming from the word India and in Japan it is known as Ai or Aizome.
Indigo is surrounded with both myth and superstition. In some cultures only women are the dyers and others only the men. It is a color worn by both peasants and royalty.
And it has medicinal properties. Here are several – an indigo dyed cloth wrapped around your forehead will alleviate a headache, wearing indigo clothing can be calming, it is a natural bug repellent and it can be used to reduce fevers.
Indigo commands respect. By this I mean that one cannot be in a bad mood or rushing when working with indigo – you will not have good results. You must be patient. Having a natural indigo vat is like caring for a child or a pet – it cannot get too cold or hot and must be fed. Well-maintained indigo vats will survive for years and years. It is said that there are 100 year-old indigo vats in Japan.
For me indigo is more than just the color blue, it is a way of life.
Linda LaBelle


Fresh Leaf Indigo Dyeing

Here is a video about Indigo Dyeing using the Fresh Leaves from my Garden!!
I love it when dreams come true! Growing my own indigo and then dyeing with it has been a long-held dream of mine. That dream finally came true right here in Greenville, SC.
My tiny patch of indigo growing on my front lawn has produced beautiful, healthy plants high in indicatin.
The seeds, Japanese Indigo – Polygonum tinctorium also called Persicaria tinctoria, came from Rowland Ricketts indigo fields in Indiana.
Jenny Balfour-Paul, author of Deeper than Indigo, kindly shared the dyeing method with me.
My next dream? An entire field of Indigo!
Yukata, indigo dyed summer kimono

The fabric for this beautiful summer kimono was dyed by my friend Theresa using the all Natural Indigo method. Incorporating a variety of Shibori techniques she dipped the fabric in her indigo pot. When Theresa was done dyeing she removed the resists, rinsed the fabric and once it was dry sewed it into this lovely Yukata.
I can’t wait to see what she does next!
If you would like to try your hand at indigo dyeing you can purchase an Indigo Kit
Indigo Kit – Questions & Answers
Answers to some questions about the Natural Indigo method
I have received e-mails with some very good questions about the Indigo Kit and thought I would post the questions & answers here.
What is different about this method?
While there are many ways to make an indigo vat the two most widely used are the chemical vat and the natural ferment vat.
The chemical vat requires lye or caustic soda and thioureadioxide (Thiox). Lye is not so easy to obtain, is toxic and must be used with care. Thiox imparts a very strong odor to the indigo vat and requires good ventilation. This type of vat is very PH sensitive and not the most stable. To adjust the PH you would use Soda Ash or lemon juice.
The natural ferment vat takes 7 – 10 days before it is ready to use, requires a dedicated space, must be kept from getting too cold or too hot and care to keep it going. The most basic formula calls for indigo, ground madder root, soda ash, bran and water. The vat requires rest periods between dyeing, it needs to be fed and nurtured. With proper care it can last for years.
With Michel Garcia’s method there is no strong odor, it is ready to use in an hour and is very stable. Like the natural ferment vat this type of vat can be kept indefinitely – it just needs to be woken up when ready to use again. It does not require dangerous chemicals (lye or caustic soda) instead it is made with fructose and lime.
Can I do this at home?
Yes. The process is virtually odorless. You can use your kitchen stove for the heat source. The goods that you dye can be rinsed in your kitchen sink. Any mess can be cleaned up with Clorox- Cleanup.
What do I need?
- A heat source, your stovetop is fine
- 16-liter (or larger) enamel or stainless steel pot with a lid
- Thermometer (a candy thermometer or digital thermometer)
- White vinegar (for neutralizing the dyed goods)
- A place to let the goods oxidize, a drying rack with newspaper underneath works well
How long does the vat last?
Indefinitely, as long as you don’t let it freeze or get too hot. The vat should be stored covered until you are ready to use it again. Store it in the cabinet under the sink, in your basement (as long as it can’t freeze), somewhere safely out of the way until you are ready to use it again.
What if I don’t want to store the vat?
In my teaching this method I explain two ways of using the vat.
The first is to use it, then store it and revive or wake up the vat when you are ready to dye again.
The second is to set your self up to do all the dyeing you are going to do until the vat is exhausted of indigo, then dispose of the vat.
How do I dispose of the vat?
Simply put – you can pour the vat in your garden or down the drain. If you have any concerns bring the PH of the vat to neutral by adding white vinegar and then pour it down the sink or in your garden.
How much can I dye with the Indigo Kit?
This is a bit of a tough question – it depends on how many dips you decide to do – at a minimum you should be able to dye one to two pounds of yarn, fabric or fiber. You can easily add more indigo to the vat as it becomes exhausted (used up).
You can purchase the Indigo Kit and additional supplies here: Indigo Kits
Indigo Kit now available at The Yarn Tree
Easy to use Indigo Kit now available at The Yarn Tree.
All natural, sustainable, practically odorless.
This is the same method I taught in Mexico.

Indigo Workshops – Oaxaca March 2012
Oaxaca – March 2nd thru March 18th 2012
My recent trip to Oaxaca, Mexico was a huge success!
I arrived late evening March 2nd at a lovely home where the family rents out rooms. I was greeted with much warmth and though they spoke little English and I even less Spanish we hit it off right away.
On the 3rd I went to the Museo Textil de Oaxaca, where I would be giving workshops over the next two weeks, to meet with Eric Chavez. We wanted to run over a few things and make sure we had all the necessary materials.
I had carried 120lbs of tools and materials with me in my luggage! But there were still a few last minute items I needed to pickup.
Sunday was a lovely, lazy day for me. I was able to stroll around Oaxaca drinking in the sights and sounds, visit my favorite street food vendors and just relax.
Monday arrived with sunshine and blue skies. This would begin five days of an indigo/ikat weft workshop involving five of the original group of ten weavers from 2010 and two new participants. Abigail, Marina, Arturo, Alfredo and Moisés had participated in the ikat warp workshop. Elda (a silk spinner) and Tito (a rug weaver) were the new participants. Adriana works for the museum, is Eufrosina’s daughter and was able to sit in on the first day of the workshop and pass the info onto to her folks. Each day we worked straight through from 10 to 3. The process of the weft ikat is more complicated than the warp ikat. The weavers had to think about their weft in a new way and when it came time to weave with their ikat yarns that would be different for them as well. They brought their own yarns (silk, wool and cotton) and dyed some of them in solid indigo blue. I also taught them Michel Garcia’s method of the lime/fructose indigo vat. They were very excited to learn this new way of making an indigo vat and the museum was thrilled as it is practically odorless! The museum supplied the indigo for the workshops and we made two 30-liter pots using the Fructose Crystalline and Calcium Hydrate (lime) and Knox Gelatin (to protect the wool and silk from the vat’s alkalinity) I brought from the States. Then we made one pot we called the Oaxacan pot – all the ingredients came from Oaxaca – the indigo, the Cal (lime), Grenetina (gelatin) and the mangoes. Eric was able to find Fructose Crystalline at the newly opened WalMart and we made another small pot using the new fructose. The workshop finished on Friday with the agreement that we would all meet at 11am on the Saturday the17th to see what they each wove with their ikat wefts. At the end of the workshop the museum presented the participants with a certificate for completing the workshop – I got one too for presenting the workshop!
Saturday the 10th I did a Shibori/indigo workshop – 23 people attended. It was a blast! Everyone had 4 silk squares for four techniques. Once their squares were wrapped, folded and bound they were dyed in indigo. For many of the participants this was their first time working with indigo and they loved it!
Ever since my first meeting with Eric over two years ago we have talked about the possibility of bringing the workshops to the villages. It is a hardship for the weavers & dyers to take the time out to travel the long distance to Oaxaca City for my workshops. Eric approached Moisés, who comes from the silk village of San Pedro Cajonos, to see if he could put something together in his village. In a very short time Moisés arranged lodging, meals and transport to his village high in the Sierra Norte. There I would be working with twenty people from four pueblos. They are part of a newly formed alliance of surrounding silk villages that is less than a year old. It is not usual for villages to work together. But in these difficult times they realized they need each other. They need to share information and when big orders come through there are many more hands now to handle the job.
Three of us would make the trip – Adriana, representing the museum, Leslie my translator and me. On Sunday morning March 11th we drove up to San Pedro Cajonos. Our driver was the husband of Elda, a silk spinner from San Pedro, she had just taken the indigo/weft ikat workshop with me and their home was where we would stay while in San Pedro. I had visited San Pedro Cajonos to interview Moisés for my book “Stories of Hope – Oaxaca; Weavers of Southern Mexico” and I was excited to return. The workshop would take place over two days. The purpose was to teach the group Michel Garcia’s lime/fructose method. Our stay was a wonderful whirlwind of visits, meals, workshops, long walks, beautiful vistas and much laughter and joy. The villagers raise their own silk worms, both wild and cultivated. They spin the silk on support spindles from the softened cocoons. They will then either dye the yarn or weave with the undyed silk and dye the finished piece. In the workshop we dyed softened cocoons, yarn, rebozos (shawls) and even a huipil (blouse) or two.
The first day we made two 30-liter pots using the lime/fructose method and one 8-liter pot using the juice from boiled mango skins and lime. The second morning we made two new 30-liter pots and dyed until we had used up all the indigo. At 2pm we had to leave for Oaxaca. I left the group making two fresh 30-liter pots on their own. I found out later that didn’t finish until after 7pm. At that time of night it is dark in the Sierra Norte and many participants still had an hour’s journey to get home. This told me the workshop was a success.
On the way back down the mountain Elda’s husband took us on a detour. We hiked up a trail to what seemed the top of the world. The silence, the beauty – feeling like you could touch the sky made the three of us giddy. This was a lovely ending to an incredible trip. We arrived back in Oaxaca City by 6:30 that evening.
Wednesday morning Leslie and I were ready for the next workshop. Again this was something new – Eric realized that not all weavers and dyers could take five days out of their schedule for a workshop – so we decided to hold two one-day workshops on how to make a simple indigo vat again using the lime/fructose method. Open to both the general public and native artisans we had eight participants for the Wednesday workshop and 14 for the Friday workshop. The workshop participants were a nice mix of artisans and hobbyists, ages and backgrounds. Several of the participants had taken the Shibori workshop and wanted to learn more about indigo. Two of the participants had been customers at The Yarn Tree when it was still in Brooklyn!
At the Wednesday workshop we had a mother and her young son. It turned out that the mother is a dyer, the father a master weaver, and the son is also an accomplished weaver. The young man had found out about the workshop on the Internet and here they were. Leslie and I visited them at their weaving studio in Teotitlán on Saturday afternoon. The dad picked wild indigo for me from the nearby arroyo, we looked at their beautiful weavings and talked color. Got to love the Internet!
On Thursday, between the two indigo workshops, I was able to have a play day at the Museum – we had 2 big indigo vats and three small ones going and several members of the museum staff came and dyed with me.
Saturday I eagerly awaited the arrival of Marina, Abigail, Alfredo, and Tito. Moisés, Elda and Arturo would not be able to make our Saturday reunion. Tito wove a small tapete (rug) Abigail a belt, Marina a bag and Alfredo wove two ponchos, a scarf, and a king-sized bedspread! I asked them all if they would continue to use this new technique (weft ikat) and they all said yes and started to tell me what they would make, what they would do differently, what problems they encountered and how they would fix the problems! From this dialogue I knew the workshop was a success.
6:am Sunday morning came too quickly – my lovely hostess came to say goodbye and I was off to the airport.
None of this could have happened without the generous support of the donors to Stories of Hope and I thank you!
Not only did the museum give me a beautiful place to work, arrange the workshops and supply me with an outstanding translator, but they also honored me with my plane ticket and I thank them for all that they have done!
Also, I need to say thank you to Leslie Larson for her enthusiasm, her patience and the great job she did being my translator!
And I thank the artisans who took time from their looms to travel and learn from me!
Part of the materials I brought with me were used in the workshops, more importantly I was able to give materials to the folks who participated in the 5-day workshop – they received Calcium Hydrate, Fructose Crystalline, Knox Gelatin and PH strips so they could make the lime/fructose vat at home. I was also able to add to the workshops tools I store at the museum.
We are already planning my return in the fall with more workshops taking place in the villages surrounding Oaxaca City.
I can only hope that you will continue to support Stories of Hope – it is thanks to you that this program continues to flourish – it is your generosity that is helping to make a difference in people’s lives!
With much Hope & Joy!
Linda
If you would like to make a tax-deductible donation, please visit my fiscal sponsor Fractured Atlas (http://www.fracturedatlas.org) and donate to Stories of Hope #2928
Photo credit: Linda LaBelle, Leslie Fiske Larson, David Marcos Garza Silva (MTO)
